High-quality conversational interfaces (chatbots and voice assistants) have traditionally been difficult and expensive to build. An effective chatbot requires Natural Language Processing/Understanding (NLP, NLU) and other Deep Learning techniques to understand the underlying intent of human language.
These techniques require skills that are difficult for individuals to acquire and expensive for organizations to hire. Even if you have the skillset at hand, the amount of conversation data required to build natural interactions is labor intensive and expensive to collect. Given these facts, building a chat interface for your application or product likely does not offer enough value for the cost. Until now.
Conversation as a Service offerings like Google Dialogflow, Amazon Lex and Azure Bot Service seek to “democratize these deep learning technologies,” thereby lowering the cost and reducing time to market while maintaining or improving interaction quality. These services abstract away the complexities of deep learning while offering flexibility so they can be used for a variety of use-cases - including your application!
This post will introduce you to Dialogflow. It will guide you through the creation of a chatbot for a fictitious Agile team management application, introducing you to key concepts of Dialogflow along the way.
In this post, you will learn the basics of:
- Agents and how to create them.
- Intents and how to detect purpose to respond to a user.
- Fulfillments and how to deliver dynamic responses.
- Integrations and how to quickly share your chatbot with others .
Ok then, let’s start building our Agile Teams chatbot!
Hello Dialogflow
A few boring, but necessary, setup tasks
The first thing you will need to do is login to the Dialogflow console. Go ahead and click Sign-in with Google and select an existing Google account or create a new account if you prefer. If this is the first time you have accessed the console using this account, Google will ask for your permission to allow Dialogflow to do a few things on your behalf:
- View and manage your data in Google Cloud Platform services.
- View and manage your Actions on Google.
- View and manage your Google Assistant voice commands, dialog and grammar.
- Submit log data for your projects.
If any of these requests give you heartburn, click Cancel and either create a new Google account for experimenting with Dialogflow or follow along with me and decide later. Just know that if you disallow these permissions, you will not be able to use Dialogflow.
Finally, read (if you must) and agree to the Terms of Service so we can move on to the more interesting things.
The Dialogflow console
You should now see the Dialogflow web console. You use this interface to manage your agents, define intents and entities, configure your fulfillment and integrations, and various other useful tasks. Yes, yes, there is also an API. Hold your horses – we'll cover using the API in a future post.
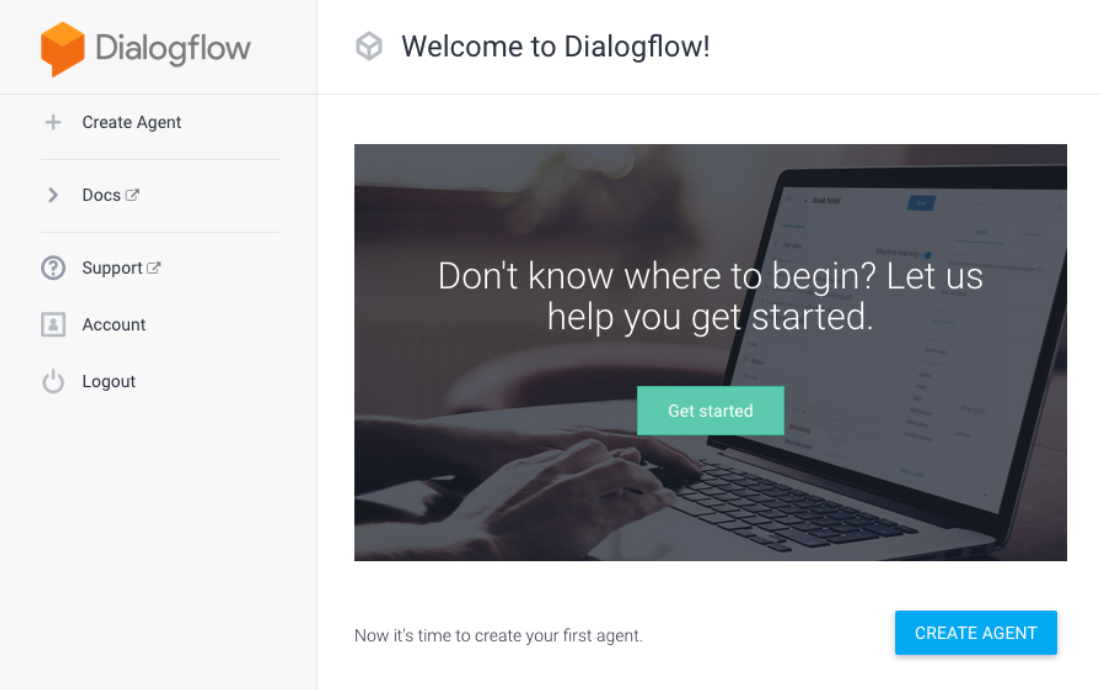
There is not much to see right now because you do not have any agents defined. Let’s remedy that by creating our new agent. But first, what’s an agent?
What is an agent?
An agent handles all the user conversations for a given use case or domain. It is responsible for translating voice or text-based communication into structured data that your application can understand so that it can act on user requests and/or fetch data to answer questions. The agent is the top-level abstraction in Dialogflow – all intents, entities and configuration for a given domain are usually housed within a single agent. It is also possible to have multiple agents within a given Dialogflow account to handle different use cases.
Teamatron9000 is born
When you click the Create Agent button, you will need to give your agent a name, choose a default language (over 20 languages are supported) and set the default time zone. You can give your agent any name you like, so long as it does not include spaces. Since I’m a huge Sci-fi geek, I’m going to name my chatbot Teamatron9000.
Go ahead and click the Create button to create your new agent. The console will do a few things for you behind the scenes:
- Create a new GCP project.
- Enable several required GCP APIs.
- Create a GCP service account for system integration.
- Create a new Agent and link it to the GCP project via the service account.
This is one of several ways that Dialogflow makes it easy to get up and running quickly so you can focus on building your bot instead of configuring GCP.
Your agent is now created and ready to go, which brings us to our next topic: Intents.
What are your intentions?
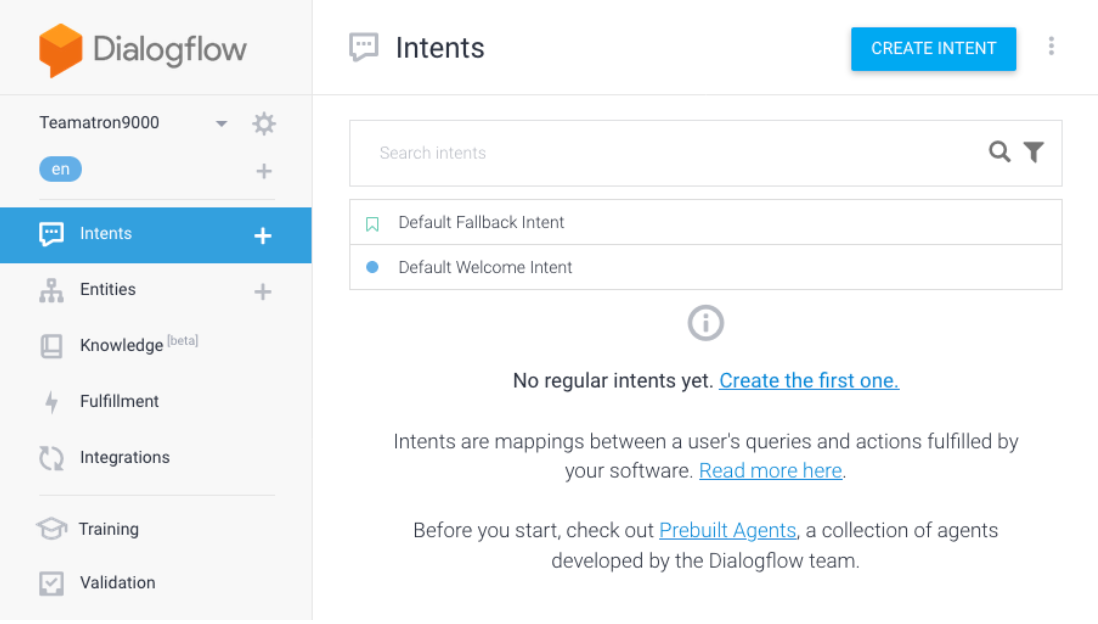
After creating the agent, the console view will change to the Teamatron9000 agent with the Intents section activated. Every new agent will have two default intents: Default Fallback Intent and Default Welcome Intent.
But what is an intent? According to the Dialogflow documentation, an intent “categorizes an end-user's intention for one conversation turn”. Hmmm, not very helpful is it? Didn’t anyone tell Google’s technical writers not to use the word in its definition? I have also seen intents defined as “mappings between a user’s queries and actions fulfilled by your software”. Let’s tweak these definitions a bit:
An intent categorizes the purpose of one side of a conversation turn, usually the user, so that the other side, usually the agent, can act and respond appropriately.
Intents are all about the purpose of the communication. Is it a greeting? Is it a request for information? Are they asking the agent to perform an action? Is the agent asking a clarifying question? Or is the purpose unknown?
Understanding the purpose behind every conversation you want your agent to support and crafting intents that cover these motivations is the most important aspect of building chatbots with Dialogflow.
Now that we have a working definition of an intent, let’s take a closer look at the Default Welcome Intent.
Greetings, earthling
Clicking on the Default Welcome Intent will take you to the intent details page. This page is broken down into six sections: Contexts, Events, Training phrases, Actions and parameters, Responses and Fulfillment.
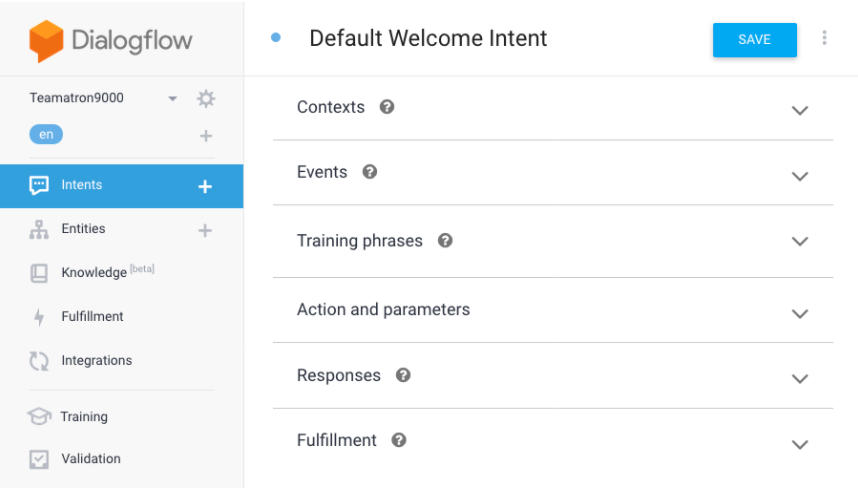
Whoa, that’s a lot to take in. Don’t worry, we will only cover training phrases, responses and fulfillment in this post. Contexts, events and parameters will be covered in future posts as we dig into more advanced topics.
Training Phrases
Taking a closer look at the training phrases for the welcome intent, you will see a set of phrases like this:
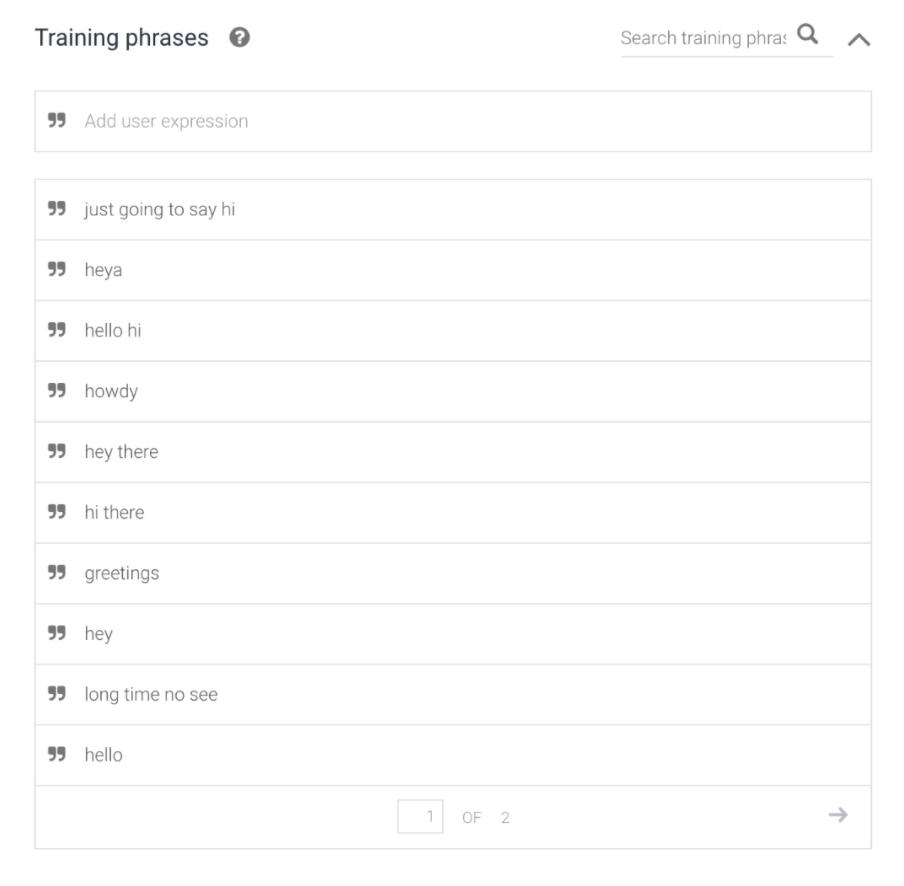
As you can see, all the phrases are commonly used English language greetings. The Default Welcome Intent created with the agent specifies sixteen total phrases. You can click the right-arrow at the bottom of the training phrases box to navigate to the next page of phrases.
So, what is going on here? Why do we need to specify phrases for our intents? Well, each of the phrases is an example of what a user could say when greeting our bot. These examples are used to teach (train is the technical term) Dialogflow what user expressions should map to our intent. If the user says/types something that resembles one of these training phrases, it will match the intent.
What happens when Dialogflow matches an intent? I’m glad you asked.
Responses
If you scroll further down the page, past Actions and parameters, you will find the Responses section. Here you can define one or more phrases to send to a user when the intent is matched by Dialogflow. The Default Welcome Intent provides the four responses shown below:
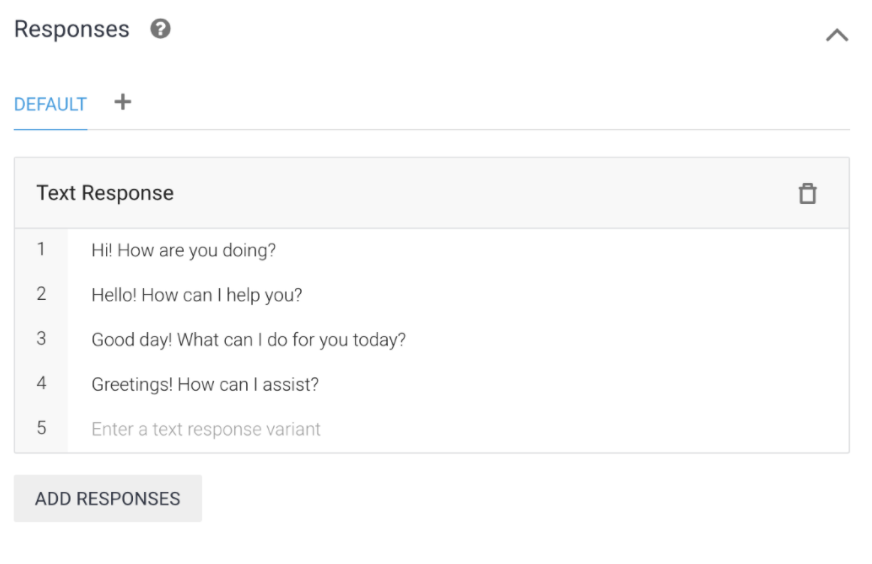
Why specify more than one phrase? You aren’t required to provide more than one response but having a variety will give your bot more personality, so it sounds less robotic. Dialogflow will select a response from the list at random whenever the intent is matched.
Take it for a spin
Now that you know some key Dialogflow concepts, let’s see our agent in action. On the top right-hand side of the Dialogflow console you will see the text Try it now randomly floating in space. If you click that text you will discover that it is in fact a text field, though you never would have guessed given the complete lack of visual affordance. Sorry, I digress.
You just discovered Dialogflow’s embedded test console. If you type “hello” into this text field and hit enter, the test console will send the phrase to your agent, run the intent matching algorithm and display the response for the matched intent, along with some diagnostic information.
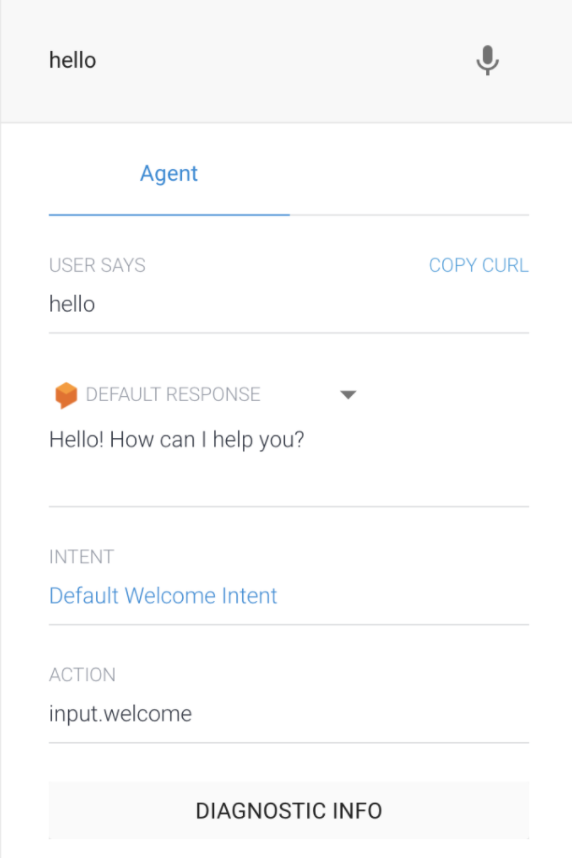
Our “hello” test phrase matched the Default Welcome Intent and responded with “Hello! How can I help you?”. Let’s test a few more phrases:
- “howdy” responded with “Hi! How are you doing?”
- “greetings” responded with “Good day! What can I do for you?”
- “hey there” responded with “Greetings! How can I assist?”
OK, so our agent is working. Whenever we send a greeting, the Default Welcome Intent is matched, and a valid response is returned. Great! This is awesome!
But wait a minute, you might ask, aren’t these phrases a bit too simplistic? They are all exact matches with a training phrase listed in the intent definition! I don’t need a fancy shmancy service from Google when a switch statement would solve the problem!
You were paying attention – gold star for you! What happens if we send a greeting that is similar to one of the training phrases, but not an exact match? Will the agent respond correctly? Let’s find out.
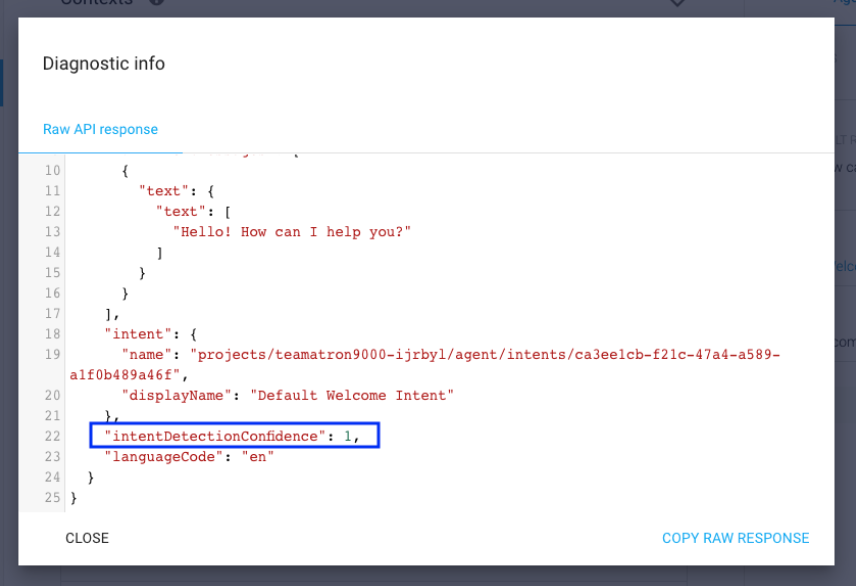
Before we do, I need to introduce the concept of intent detection confidence. In each of the above cases, Dialogflow was 100% confident that it matched the correct intent. The test console doesn’t display the confidence in the main view, but you can find it by clicking the Diagnostic Info button.
So, what if the user sends a phrase that is not an exact match?
- “nice day, isn’t it” responded with “Greetings! How can I assist” (confidence: 67%).
- “great day, right?” responded with “Hi! How are you doing?” (confidence: 49%).
- “hey there, how are you” responded with “Hello! How can I help?” (confidence: 70%).
None of these sample phrases exactly match a training phrase. Dialogflow managed to match the correct intent anyway, but with reduced confidence. The default minimum match threshold is 30% but is configurable at the agent level (see ML Classification Threshold in the agent settings).
What happens if none of the intents match at the minimum threshold? Good question. Try typing the phrase “what’s up” into the test console. In this case, Dialogflow matched the Default Fallback Intent and responded with “Say that one more time?”.
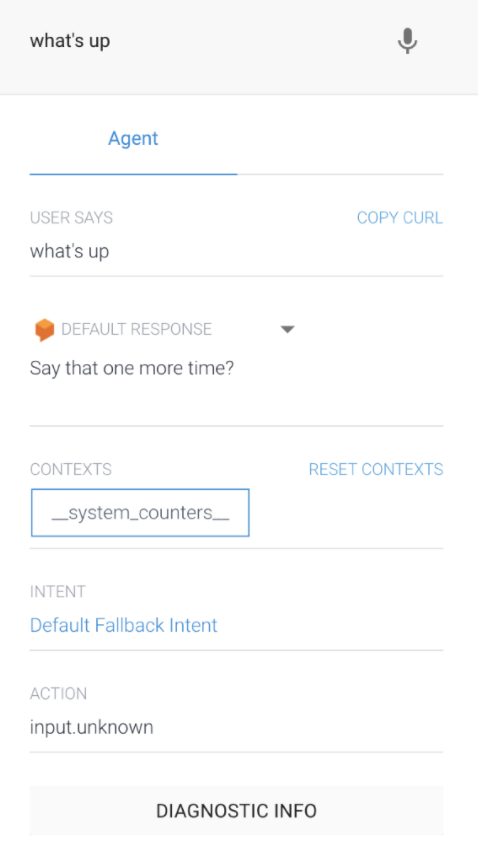
What is a Fallback Intent?
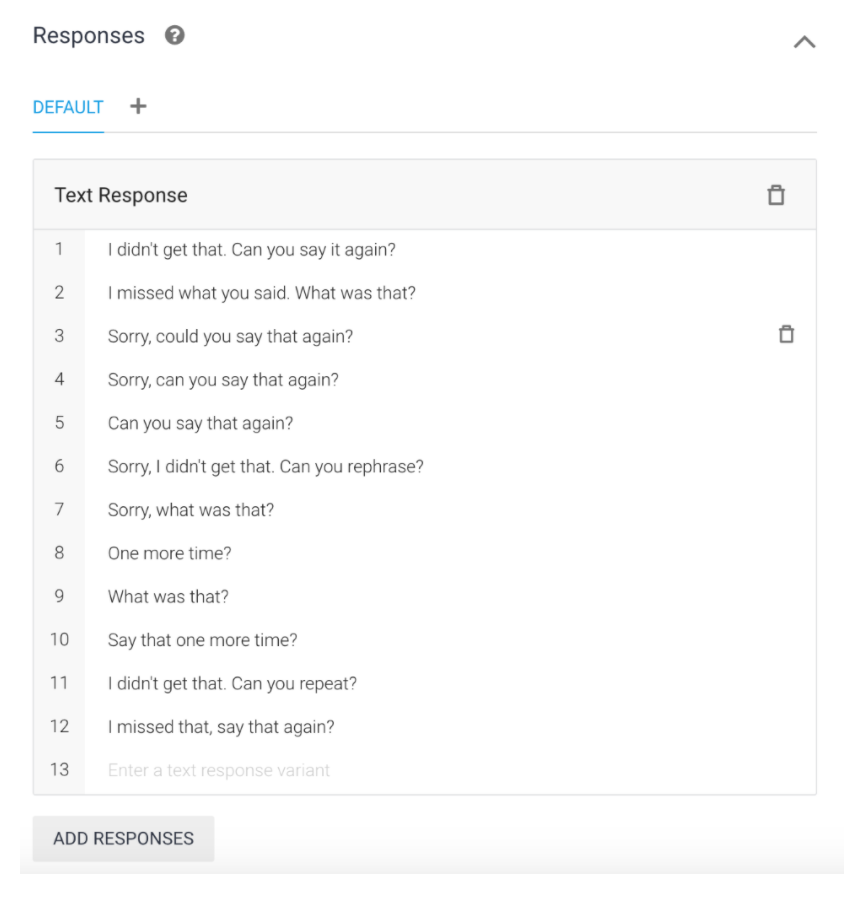
The Default Fallback intent is matched if no regular intent matches within the defined minimum match threshold. Fallback intents are the “else” of an “if-then” statement or the “default” clause of “switch” statement. Fallback intents should have responses that indicate the agent does not understand or support the user’s statement. The responses for the default fallback intent are shown below:
The phrase “what’s up” apparently did not meet the minimum match threshold for the Default Welcome Intent and so the Default Fallback intent was matched instead. Let’s try a few more phrases to see fallback intents in action:
- “yo” responded with “One more time?”
- “hiya” responded with “What was that?”
- “what is the airspeed velocity of an unladen swallow” responded with “Can you say that again?”
Let’s see if we can teach our agent to respond to these user expressions.
Adding Training Phrases
Add the following phrases to the Default Welcome Intent using the text field at the top of the training phrase list labelled Add user expression:
- what's up
- yo
- hiya
Click the Save button at the top of the screen near the intent name to update the intent definition. When you change and then save an intent, the models backing the intent will be re-trained. You will see notifications appear in the bottom right-hand corner of your browser to alert you when agent training starts and completes. You will need to wait for training to complete before you can test the changes to your intent.
Training complete? Great, let’s see if it worked:
- “what’s up” responded with “Hello! How can I help you?”
- “yo” responded with “Greetings! How can I assist?”
- “hiya” responded with “Hi! How are you doing?”
- “whats up” responded with “Good day! What can I do for you today?”
- “what is up” responded with “Greetings! How can I assist?”
- “what up” responded with “Sorry, what was that?”
Interesting. Some variations of “what’s up” are considered similar enough to match the welcome intent while others (e.g. what up) do not match. This is illustrative of the process you will use to define your intents. Define test phrases, train the model and test. Tweak or define more test phrases, train the model and re-test. Over and over, until you are happy with the variety of user expressions your intent supports.
How many teams do I have?
Now that you have some foundational knowledge of Dialogflow, let’s start transforming our agent into Teamatron! We’ll begin by teaching our agent how respond to the question: “How many teams do I have?”
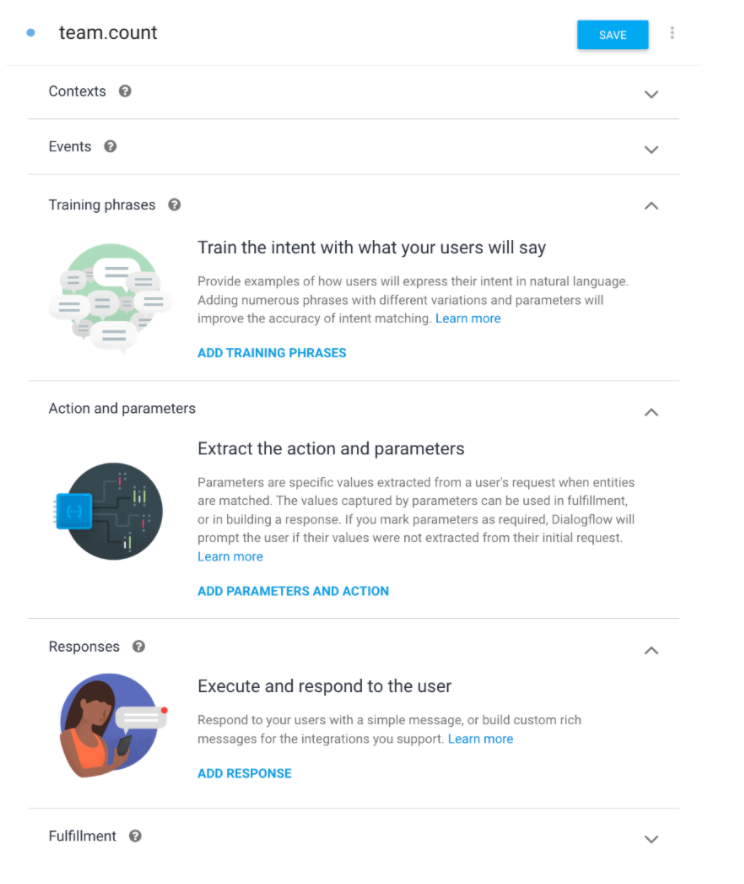
Creating the Team Count intent
Go ahead and create a new intent and name it team.count. You could give the intent any name you want however I recommend starting with the primary domain/model, followed by a non-space delimiter and then a verb that describes how you are responding to the request. The Dialogflow console does not provide a method of organizing your intents (i.e. folders or namespaces) but it does sort the intents in alphabetical order by name. A consistent naming scheme will help you stay organized as your agent grows in complexity.
Now let’s add some training phrases so Dialogflow will know when to match our intent. Think about the way users could ask for the number of teams. Consider synonyms for words in your phrases and rearrange the order of the subject, verb and object words in the sentence to get some variety. I like to write my test phrases in a text editor (e.g. VS Code or Atom) first as it makes it easier to copy/paste phrases and tweak the list.
Here are the training phrases I am using:
- how many teams do we have?
- what is the team count?
- what are the total number of teams?
- total team count.
- total number of teams.
- count of teams.
- number of teams.
- # of teams.
- how many teams are there.
Note that I chose to use “count,” “total,” “#” and “how many” as synonyms for “number of,” re-arranged the order of the words and stripped away filler words to support terse questions. There is likely unnecessary duplication here but that’s fine. It is better to have more training phrases than worry too much about possible duplication.
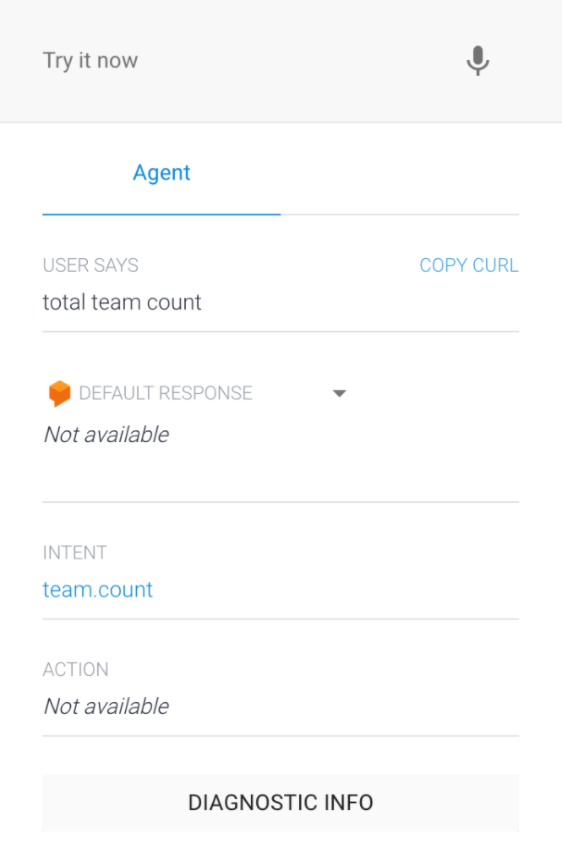
Now let’s save the intent so we can test it. Once training is complete, type “how many teams do we have” or “total team count” into the test console. You will note that Dialogflow matches our team.count intent for both expressions.
See if you can stump the agent by asking in ways you did not specify in the training phrases. Try misspelling words, especially key words like count or teams. In my experience, Dialogflow can support some misspelling and mangling of user text and still match the correct intent.
You may be wondering why we did not create any responses. For this intent, we need to know the number of teams before we can give an accurate response. It’s not possible to supply dynamic information in the static responses defined in the console. For that, we will need to use a fulfillment.
A fulfilling experience
What’s a fulfillment, you ask? You have such great questions! A fulfillment is logic (code) that executes when an intent is matched. This code is responsible for performing the requested action and/or fetching the required data and then generating an appropriate response to send to the user. When your intent needs to perform an action or return a dynamic response, you will need to lean on the fulfillment feature to accomplish your goal.
Here is how it works. When Dialogflow matches an intent with fulfillment enabled, it sends a webhook request to the fulfillment service. The webhook request contains key information about the intent such as name, detection confidence and other useful information we will cover in future posts. The fulfillment service uses the request information to perform an action or fetch data from a database or API and craft a response to the user. The service returns a webhook response to Dialogflow, which includes the generated user response among other details. Dialogflow then sends the response to the user via the active integration (e.g. Slack, Google Assistant, etc...).
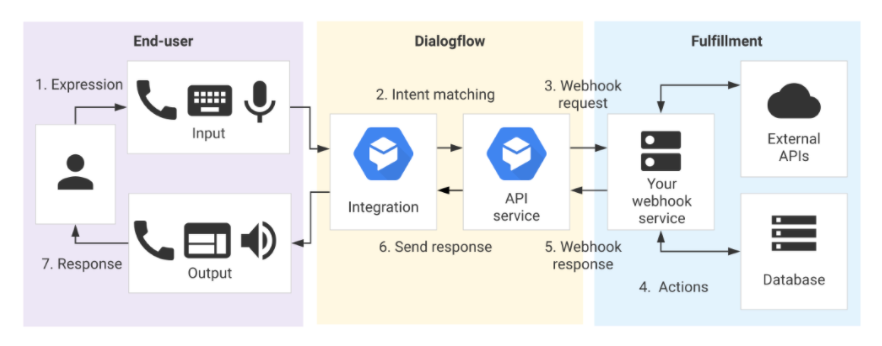
As you can see in the diagram, your fulfillment service is externally hosted and triggered via a webhook. You can host the service anywhere but Dialogflow offers a convenient inline editor that hosts your service in a Google Cloud function in your GCP project. We will use this option for our Teamatron demo.
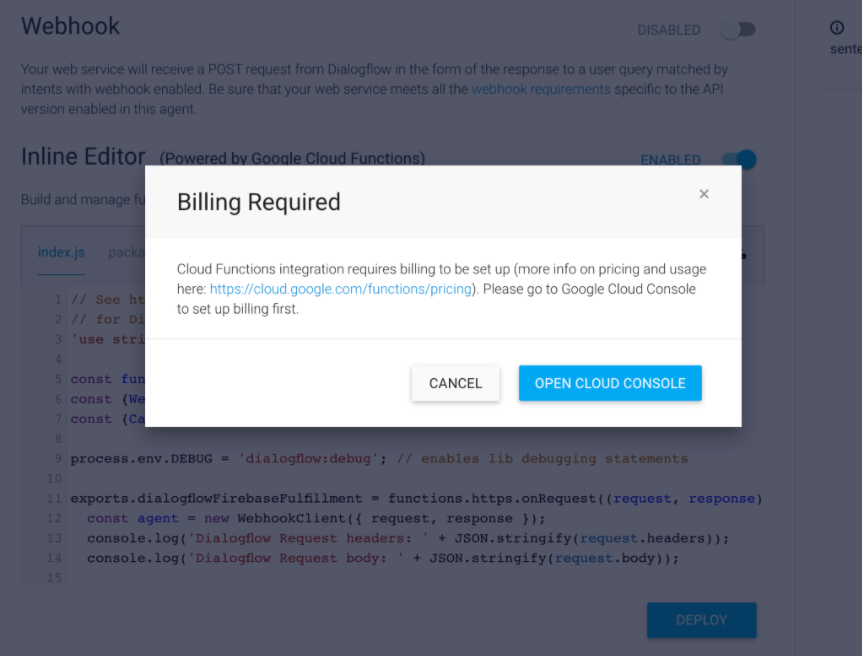
Click on Fulfillment in the console’s sidebar to view the fulfillment page and click the toggle for the Inline Editor option. You will need to enable billing in your GCP project as Cloud Functions are compute services that might incur cost. Don’t worry, the first 2 million invocations of your function are free, so you are unlikely to incur charges for this demo.
It’s finally time to write some code. NodeJS is the only option when using the inline editor so I hope you like JavaScript. The inline editor comes pre-loaded with sample code that leverages the Dialogflow fulfillment library, an npm package that simplifies development of fulfillment services.
Go ahead and delete the sample code in the inline editor, copy/paste or write the code listed below and click the Deploy button. The inline editor option may be convenient, but it is not very user friendly for development. I usually write fulfillment logic in an external editor and then paste it into the inline editor when I’m ready to deploy.
const functions = require('firebase-functions');
const { WebhookClient } = require('dialogflow-fulfillment');
process.env.DEBUG = 'dialogflow:debug'; // enables lib debugging
// Our sophisticated teams database
const teams = [
{ name: 'Born to Code' },
{ name: 'Feeling Scrummy' },
{ name: 'FrAgile Management' },
{ name: 'Brewing Javascript' },
{ name: 'Keep Calm and Sprint On' },
];
const intentHandlers = new Map();
// dialogflowFirebaseFulfillment is a magic name. Don't change it!!!
exports.dialogflowFirebaseFulfillment = functions.https.onRequest((request, response) => {
console.log(`Req headers: ${JSON.stringify(request.headers)}`);
console.log(`Req body: ${JSON.stringify(request.body)}`);
new WebhookClient({ request, response }).handleRequest(intentHandlers);
});
functionrandomResponse(responses) {
return responses[Math.floor(Math.random() * responses.length)];
}
// map intents to handlers by name
intentHandlers.set('team.count', client => {
const teamCount = teams.length;
const possibleResponses = [
`There are ${teamCount} teams`,
`The team count is ${teamCount}`,
`${teamCount} teams`,
`Team count: ${teamCount}`,
];
client.add(randomResponse(possibleResponses));
});
The above code is relatively simple. The exported function named dialogflowFirebaseFulfillment processes the webhook request by creating an instance of the WebhookClient class and calling its handleResponse method with a map of handler functions. The handleResponse method is a dispatcher that will call the handler in the intentHandlers map whose key matches the name of the matched intent. The team.count handler counts the number of teams in our fake team database and uses the WebhookClient::add method to add one of four random responses to be sent to the user.
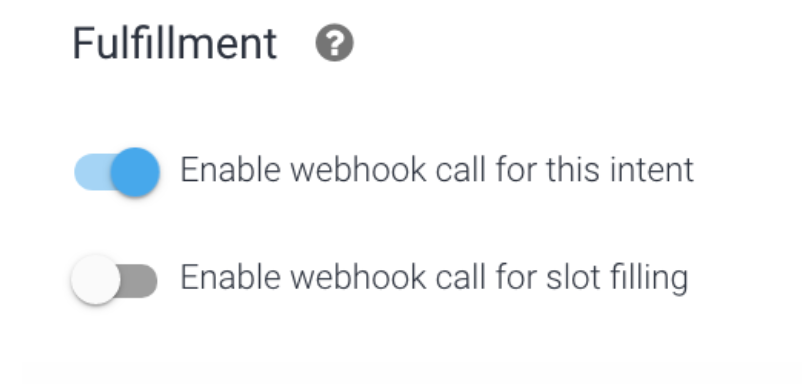
It’s almost time to test our shiny new fulfillment logic but first we need to enable fulfillment for our intent. Go back to your team.count intent, expand the Fulfillment section, click Enable Fulfillment and toggle on Enable webhook call for this intent. This option is unchecked by default for each intent you create so don’t forget to enable it when needed.
It’s alive!
Let’s see if our hard work paid off. Hop over to the test console and ask your agent for a count of teams:
- “count my teams” responded with “5 teams”
- “how many teams” responded with “Team count: 5”
- “# of teams” responded with “There are 5 teams”
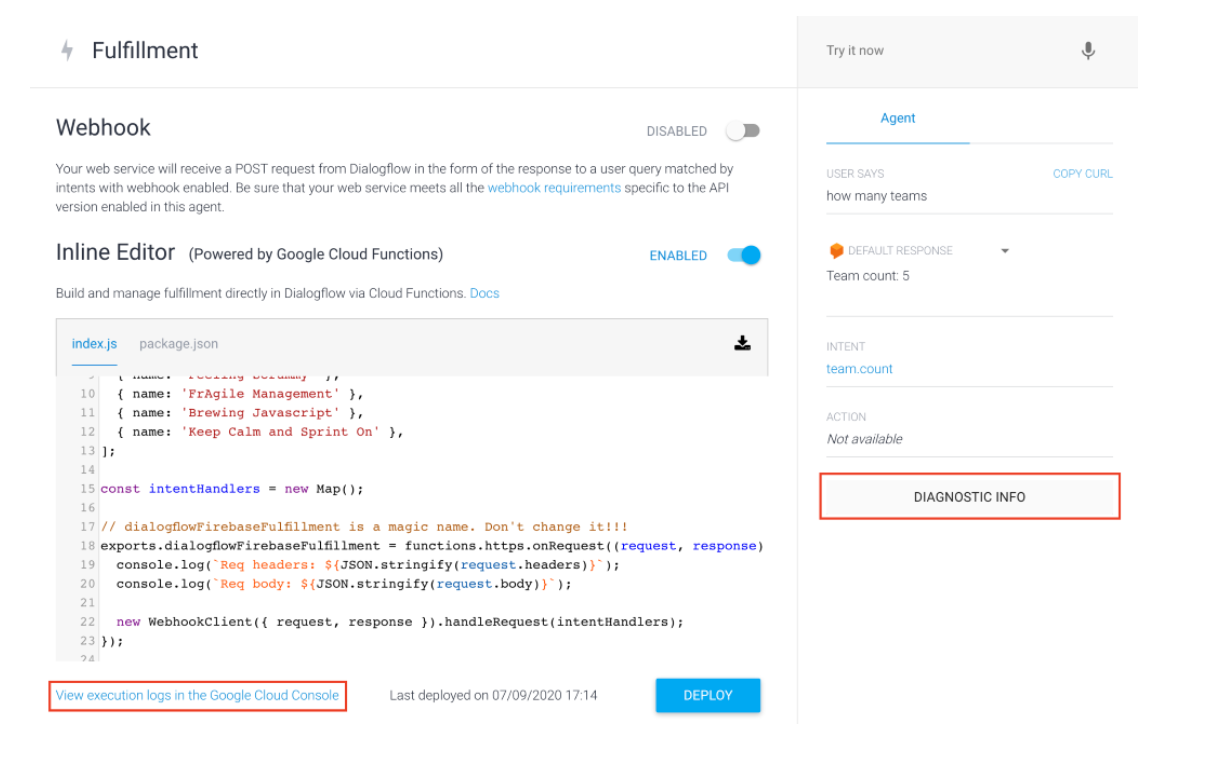
It works! For me, anyway. If it’s not working for you, there are few ways to troubleshoot your issue. First, click the Diagnostic Info button at the bottom of the test console and review the information within. The tabs at the top of the modal allow you to switch between the raw API response, the fulfillment request/response and the fulfillment status. If this doesn’t reveal the issue, try checking the logs in your Google Cloud function. There is a convenient link that takes you directly to the log viewer below the Inline Editor on the Fulfillment page.
Integrations
Teamatron9000 is now operational. It can only answer one team-oriented question (with fake data) so it’s not ready for your customers, but you may want to share it with your boss or team for feedback. How do you do that without giving them access to your Dialogflow account? This is where integrations come into play.
DialogFlow integrates with a large selection of conversation platforms including Google Assistant, Slack, Facebook Messenger and more. While these integration options are relatively simple to use, the absolute easiest way to share your agent is via the Web Demo integration.
Web Demo
To enable the web demo, click the Integrations link in the sidebar and scroll down the list until you see Web Demo and click the toggle.
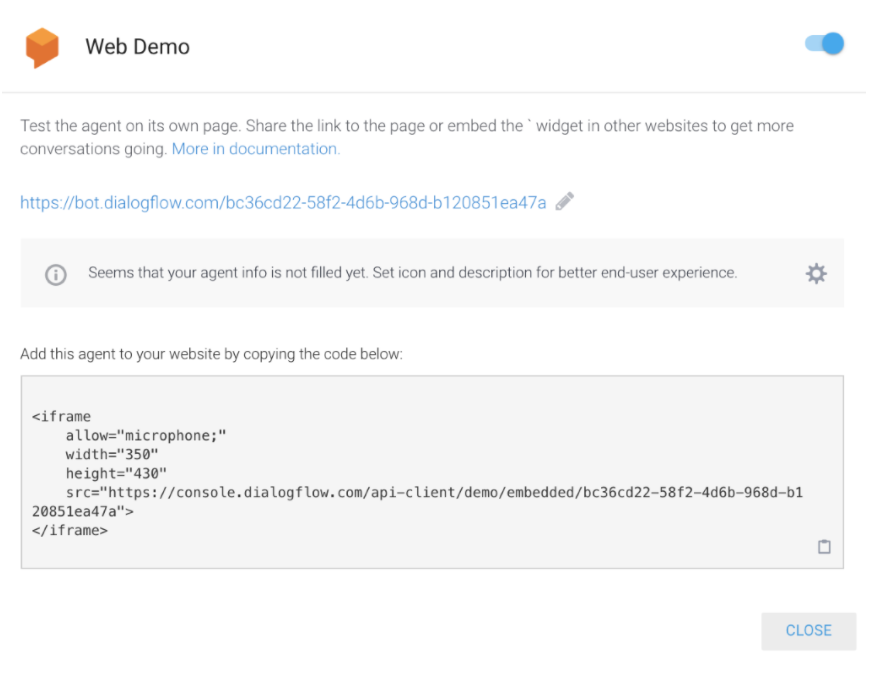
The modal will have a link you can share with your boss or co-workers, as well as instructions for embedding the web demo into the web page of your choice, as demonstrated below.
Wrapping up
This post introduced you to the basics of Dialogflow but barely scratches the surface of how Dialogflow can help you build engaging and powerful conversational interfaces. My next post on this topic will show how you can parameterize your training phrases using built-in/custom types called entities. I will also dig deeper into integrations and show how easy it is to use Slack to deliver rich and interactive responses to your users from Dialogflow.