Ever wondered what it would be like to build your own screen reader? With the Web Speech API, this is an achievable task. In this article, we'll be building out a basic text to speech reader while exploring some other functionalities that we can use as well. There are some ugly drawbacks to this technology, but we'll explore those as we go along. For now, let's take a look at what this tech is and what we can do with it.
Web Speech API 🗣
The Web Speech API is an audio interface provided by the browser for handling audio inputs and outputs. This means that while we'll be primarily focusing on the audio output feature as part of this article. We can also accomplish tasks like speech recognition through the separate input controller for SpeechRecognition. The Web Speech API exposes a SpeechSynthesis controller which provides us access to some basic customization options for setting up our audio text reader.
Compatibility 🤷🏽♂️
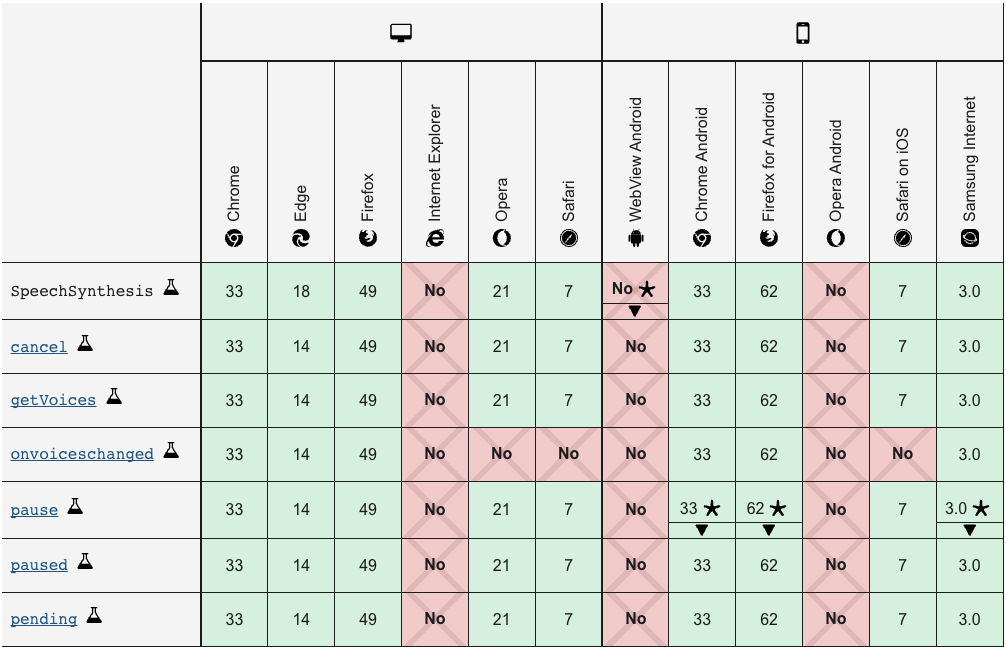
While the Web Speech API has been around for a while, it isn't compatible with every browser. In fact, currently, the entire Web Speech API as a whole is still in the experimental phase. This means that while these solutions will work right now, the API may change in the future resulting in unwanted bugs or errors. Basically, use this API at your own discretion and do not include it in production code if you want to avoid these issues. SpeechSynthesis API holds slightly more browser support than the SpeechRecognition API at this point.
What we'll be building

We'll be building a simple reader using the SpeechSynthesis API and React. You could do this with just JavaScript but that's not as fun. The code to the codesandbox example will be at the end of this article in case you get stuck. This application will do the following:
- Expose a play button which will allow the user to hear the audio feed
- Expand to show the time that has elapsed since it has began reading
- Close if the play button is pressed again or when done reading
- Display an small animation while playing
- Clean up the SpeechSynthesis to ensure it does not cause a memory leak
Getting Started
This article will assume that you already have Node/NPM installed. If you're not sure, open a terminal and type the following and then check the result after the input:
$npm -v
This should show you your current npm version. If you see an error here then you will need to go to the NodeJS website and follow the installation instructions there. Npm will come packaged with node.
If you're all good there, then we can continue by creating our React app. Let's begin with our create react app script.
$npx create-react-app text-reader
# or
$yarn create react-app text-reader
# if you would like to use TypeScript
$npx create-react-app my-app --template typescript
This will create a project called text-reader which will have all of our base react code along with some example code. I'll be using codesandbox for my project so some of the boilerplate code will look different, but ultimately it will be the same thing. To run your app and see it loaded in your local environment, run the following script in your terminal:
$npm run start
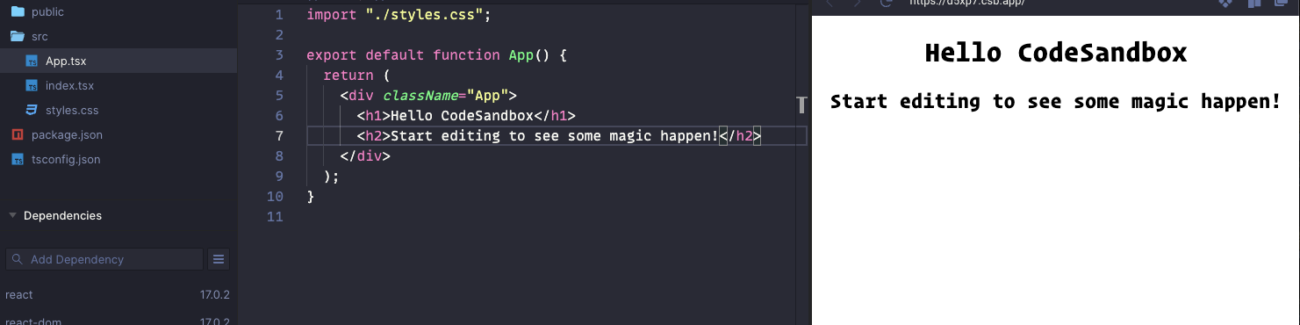
If you're not familiar with React, that is ok as we'll be walking through our steps in greater detail. For now, locate your App.js and styles.css files and replace all of the boilerplate code inside of the component with the following.
import "./styles.css";
export default function App() {
return (
<div className="reader_wrapper">
<div> hello World</div>
</div>
);
}
Then let's begin by adding the following style in our styles.css
.reader_wrapper {
margin: 1em 0;
width: 100%;
border-radius: 30px;
}
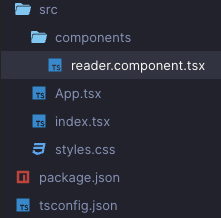
The main purpose of the above is just to check for any errors in our environment and make sure that it all works before moving forward. Next, we'll create a directory to house our components and place a new Reader.component.js file into it. Let's do that now.
Inside of the Reader component, add the following code to make sure it works.
const Reader = () => {
return (
<h1>Reader component</h1>
)
}
export default Reader;
Then import it into your App.js file to see it load on your browser.
import "./styles.css";
import Reader from './components/reader.component'
export default function App() {
return (
<div className="reader_wrapper">
<Reader />
</div>
);
}
You should now see the h1 text from Reader rendering in your browser. While we're at it, let's create a sample_text.md file and throw in the following lorem ipsum text.
Bacon ipsum dolor amet pork belly pancetta meatloaf alcatra sausage ham hock.
Capicola ball tip landjaeger andouille tail pancetta. Corned beef t-bone
tenderloin ham tongue. Landjaeger swine pork chop fatback chislic shoulder.
Boudin meatball alcatra, short loin rump kevin andouille kielbasa swine
t-bone ground round fatback jerky. Short loin swine cupim bresaola spare ribs.
Ham hock shoulder bacon beef ribs, pastrami alcatra venison pork chop sausage
pig tri-tip meatloaf chicken.
We'll be using this as example text for our small application. If you would like to instead use an input to gather the user feed for this, you could skip the below code and instead implement it there.
If you would like to continue with this approach, we'll be adding some code to handle the markdown in our App.js
Note that if you're following along with typescript, you will have to create a .d.ts file and add the following code to declare the md type. If you're not sure how to do this, check the solution code at the bottom of this article.
declare module '*.md' {
const value: string; // markdown is just a string
export default value;
}
In App.js add the following to get the example code.
import { useEffect, useState } from 'react';
import "./styles.css";
import Reader from './components/reader.component'
import mdText from './sample_text.md'
export default function App() {
const [textToRead, setTextToRead] = useState('');
useEffect(() => {
console.log(mdText)
}, []);
return (
<div className="reader_wrapper">
<Reader />
</div>
);
}
The above code will logout a base64 hash of the md file content which will look something like this:
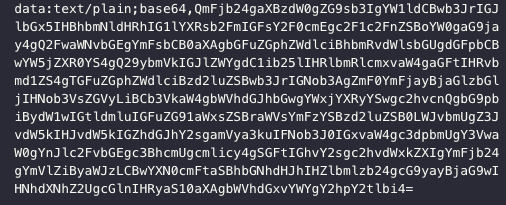
This method is a way to transfer a data object via http protocol. We'll need to fetch it and resolve the data. We can do this very easily by using the fetch API.
import { useEffect, useState } from 'react';
import "./styles.css";
import Reader from './components/reader.component'
import mdText from './sample_text.md'
export default function App() {
const [textToRead, setTextToRead] = useState('');
useEffect(() => {
fetch(mdText)
.then((response) => response.text())
.then((text) => {
setTextToRead(text);
});
}, []);
return (
<div className="reader_wrapper">
<Reader />
<p>{textToRead}</p>
</div>
);
}
We should now see the markdown text rendering in our browser.
We'll be passing this text to our Reader component as a prop.
<div className="reader_wrapper">
<Reader textToRead={textToRead} />
</div>interface IReader {
textToRead: string
}
const Reader = ({ textToRead }: IReader) => {
// handles in case no text is loaded
if (!textToRead) {
return (
<p>Awaiting Text</p>
)
}
return (
<h1>Reader component</h1>
)
}
export default Reader;
The fun part 🎶
Now that the base setup is done, we can create the file where our SpeechSynthesis functionality will live. We want to keep this separate to keep it maintainable. Let's create a speech-synth.utils.js file. Feel free to drop this into your components directory or create a separate utils directory for it.
We'll hop right into that file and begin adding the some logic. The first piece of code will fetch us the list of voices that we can use. This can be very useful if you would like to create a feature that allows the user to select the voice that they want to use.
Skipping this step will likely result in an error for not providing a voice to your SpeechSynthesis. Not making it Async will result in issues where the voice might cut out or not be ready when the speech synth begins to attempt to read.
Now let's add our main speak function. This function will be the one that gets called and handles the speech operations for us.
// the func that will be called by your component
export async function speak(textToRead: string, onEndCallback: (status: string) => void, synth: SpeechSynthesis) {
if (speechSynthesis.onvoiceschanged !== undefined) {
speechSynthesis.onvoiceschanged = () => populateVoiceList
}
if (synth.speaking) {
console.error("speechSynthesis.speaking")
return
}
if (textToRead !== "") {
const utterThis = new SpeechSynthesisUtterance(textToRead)
utterThis.onend = function (event) {
onEndCallback("_play")
}
utterThis.onerror = function (event) {
console.error("SpeechSynthesisUtterance.onerror")
}
// utterThis.voice = voices[0]
utterThis.pitch = pitch
utterThis.rate = rate
synth.speak(utterThis)
}
A few things to note about the above code. The params are written with TypeScript types to help identify for reading purposes, feel free to remove this if you're just using JavaScript. If you decide to use TypeScript however, you can export the following enum to help you with the status.
export enum PLAY_STATUS {
PLAY = '_play',
STOP = '_stop'
}
// use it in components as
PLAY_STATUS.PLAY;
PLAY_STATUS.STOP;
Then just exchange anywhere you see _play and _stop with the appropriate enum value.
Connecting it together
Now that we have completed the base setup for our speech synthesis logic, we can bring it into our reader.component.js file.
import { useState } from 'react'
import { speak } from '../utils/speech-synth.utils'
interface IReader {
textToRead: string
}
const Reader = ({ textToRead }: IReader) => {
const [playStatus, setPlayStatus] = useState("_play")
const handleClick = () => {
speechSynthesis.cancel()
setPlayStatus(prev => {
if (prev === "_play") {
// if uncommenting code above, replace textToRead with text here
speak(textToRead, setPlayStatus, window.speechSynthesis)
return "_pause"
}
return "_play"
})
}
return (
<div className="loader">
<div className="wrapper">
<div
className="player_main_control"
onClick={() => handleClick()}
onKeyPress={() => handleClick()}
aria-hidden="true"
>
<div className="control_play_pause">
<div className={`control_icon_${playStatus}`}>
{playStatus === "_play" ? (
<p>stopped</p>
) : (
<p>playing</p>
)}
</div>
</div>
</div>
</div>
</div>
)
}
export default Reader;
Styling and animations
While we're able to play the text and hear the SpeechSynthesis read it out laud, it's not much to look at. Currently it just has text rendering the play status. We'll like to style this up a bit and eventually give it some cool animations. Let's start off with the css. I'll be dropping it all into the styles.css file, but feel free to make individual stylesheets for the components if you would like. Let's add the following styles to get a nice blue circle around the clickable area:
.wrapper {
height: 100%;
width: 8em;
margin: 0 auto;
color: var(--color-text);
display: flex;
align-items: center;
justify-content: flex-start;
position: relative;
}
.player_main_control {
display: flex;
flex: 0 0 55px;
justify-content: center;
align-items: center;
width: 55px;
height: 55px;
margin-right: 10px;
background-color: hsla(217, 89%, 61%, 1);
color: white;
border-radius: 50%;
box-shadow: rgb(0 0 0 / 20%) 0px 2px 1px -1px,
rgb(0 0 0 / 14%) 0px 1px 1px 0px, rgb(0 0 0 / 12%) 0px 1px 3px 0px;
z-index: 1;
}
.control_play_pause {
width: 100%;
height: 100%;
display: flex;
align-items: center;
justify-content: center;
cursor: pointer;
}
.control_icon__play {
margin-left: 4px;
display: flex;
align-items: center;
justify-content: center;
}
.read_spectrum__pause {
width: 800px;
transition: 3s all ease-in;
}
.read_spectrum__play {
width: 0%;
overflow: hidden;
transition: 3s all ease-out;
}
Your clickable area should begin to look something like the following:

As we can see, it's looking a little better but hasn't really solved any issues other than the base styling. We'll want to start setting up the default look for our "play" action. If you have a "Play" image you would prefer, feel free to use that and style it to fit, I'll be using FontAwesome to get the play button. Let's install the react package for FontAwesome and drop it into our app.
$npm i @fortawesome/react-fontawesome @fortawesome/free-solid-svg-icons @fortawesome/fortawesome-svg-core
Now back in our reader.component.js file, we can bring in the following imports at the top of the page:
...
import { FontAwesomeIcon } from "@fortawesome/react-fontawesome"
import { faPlay } from "@fortawesome/free-solid-svg-icons/faPlay"
...
<div className="control_play_pause">
<div className={`control_icon_${playStatus}`}>
{playStatus === "_play" ? (
<FontAwesomeIcon icon={faPlay} /> // <--- here
) : (
<p>playing</p>
)}
</div>
</div>

Now we have our super cool play button. Here's where the fun begins though. The next step in the process is that we'll want a simultaneous action where once the play button gets clicked the following happens:
- A shelf extends out and tells us how much time has passed since it has began reading
- The icon changes to a simulated voice spectrum which shows users that it is reading something
Let's begin with the animated spectrum.
Animated voice spectrum
The speech synthesis API is pretty cool, but lacks a lot of key features we would ultimately want in a full package. A few features I would love added are:
- Ability to know how long it will take to read a provided string of text
- A wave length stream to get actual spectrum data
Because we lack those two features, it limits a lot of the other things we can do with it on the presentational side. Which is why we will be using an svg for the spectrum animation.
Let's begin by making a read-spectrum.component.js file within our components directory.
const ReadSpectrum = () => {
return (
<div className="loader">
<svg
className="wave"
data-name="Layer 1"
xmlns="<http://www.w3.org/2000/svg>"
viewBox="0 0 50 38.05"
>
<title>Audio Wave</title>
<path
className="line_1"
data-name="Line 1"
d="M0.91,15L0.78,15A1,1,0,0,0,0,16v6a1,1,0,1,0,2,0s0,0,0,0V16a1,1,0,0,0-1-1H0.91Z"
/>
<path
className="line_2"
data-name="Line 2"
d="M6.91,9L6.78,9A1,1,0,0,0,6,10V28a1,1,0,1,0,2,0s0,0,0,0V10A1,1,0,0,0,7,9H6.91Z"
/>
<path
className="line_3"
data-name="Line 3"
d="M12.91,0L12.78,0A1,1,0,0,0,12,1V37a1,1,0,1,0,2,0s0,0,0,0V1a1,1,0,0,0-1-1H12.91Z"
/>
<path
className="line_4"
data-name="Line 4"
d="M18.91,10l-0.12,0A1,1,0,0,0,18,11V27a1,1,0,1,0,2,0s0,0,0,0V11a1,1,0,0,0-1-1H18.91Z"
/>
<path
className="line_5"
data-name="Line 5"
d="M24.91,15l-0.12,0A1,1,0,0,0,24,16v6a1,1,0,0,0,2,0s0,0,0,0V16a1,1,0,0,0-1-1H24.91Z"
/>
</svg>
</div>
)
}
export default ReadSpectrum
It's a very basic SVG which draws some adjacent lines. Currently they won't do anything but sit there pretty, so we need to add our animation styling. Again, you can toss this into your styles.css or add it to a component stylesheet.
.loader {
width: 100%;
height: 100%;
display: flex;
align-items: center;
justify-content: center;
cursor: pointer;
margin-left: 0.2em;
}
.wave {
height: 55px;
width: 55px;
fill: #fff;
margin-left: 1.2em;
display: flex;
align-items: center;
justify-content: center;
}
.line_1 {
-webkit-animation: pulse 1s infinite;
animation: pulse 1s infinite;
-webkit-animation-delay: 0.15s;
animation-delay: 0.15s;
}
.line_2 {
-webkit-animation: pulse 1s infinite;
animation: pulse 1s infinite;
-webkit-animation-delay: 0.3s;
animation-delay: 0.3s;
}
.line_3 {
-webkit-animation: pulse 1s infinite;
animation: pulse 1s infinite;
-webkit-animation-delay: 0.45s;
animation-delay: 0.45s;
}
.line_4 {
-webkit-animation: pulse 1s infinite;
animation: pulse 1s infinite;
-webkit-animation-delay: 0.6s;
animation-delay: 0.6s;
}
.line_5 {
-webkit-animation: pulse 1s infinite;
animation: pulse 1s infinite;
-webkit-animation-delay: 0.75s;
animation-delay: 0.75s;
}
@-webkit-keyframes pulse {
0% {
transform: scaleY(1);
transform-origin: 50% 50%;
}
50% {
transform: scaleY(0.7);
transform-origin: 50% 50%;
}
100% {
transform: scaleY(1);
transform-origin: 50% 50%;
}
}
@keyframes pulse {
0% {
transform: scaleY(1);
transform-origin: 50% 50%;
}
50% {
transform: scaleY(0.7);
transform-origin: 50% 50%;
}
100% {
transform: scaleY(1);
transform-origin: 50% 50%;
}
}
Now we can go back into our reader.component.tsx file and import our new read-spectrum component.
import ReadSpectrum from './read-spectrum.component'
Then in the else clause of our ternary within the JSX, we can replace "playing" text.
<div className={`control_icon_${playStatus}`}>
{playStatus === "_play" ? (
<FontAwesomeIcon icon={faPlay} />
) : (
<ReadSpectrum />
)}
</div>
You should now be able to click on the reader button and see the SVG animation while the text is being read. Once the text is done reading, it should revert back to the play button. To test this quicker you can go back into the sample_text.md file and remove some of the lorem ipsum text.

Finishing Touches 😤
We solved for the Speech Synthesis reader fairly quickly and even added some wave spectrum animation to simulate the sound. Now we can add the final piece to the puzzle, the slide out drawer which houses the elapsed time.
Let's start this off by hopping into our components directory and creating a read-tim.component.js file. Feel free to rename this one as I'm often not that great at naming these things 😅.
import React, { useState, useEffect } from "react"
// counter value
let totalSeconds = 0
const ReadTime = ({ loaded }) => {
const [displayTime, setDisplayTime] = useState("00:00")
// will use to pad our start and end when formatting our elapsed time
const pad = (val: string) => {
let valString = `${val}`
if (valString.length < 2) {
return "0" + valString
} else {
return valString
}
}
useEffect(() => {
if (loaded) {
let timer = setInterval(() => {
++totalSeconds;
const minutes = `${parseInt(`${totalSeconds / 60}`, 10)}`;
const seconds = `${parseInt(`${totalSeconds % 60}`, 10)}`;
setDisplayTime(`${pad(minutes)}:${pad(seconds)}`);
}, 1000);
// important to clean up our timers to avoid memory leaks
return () => clearInterval(timer)
} else {
setDisplayTime("00:00")
totalSeconds = 0
}
// we want this to run any time there a change to the loaded status
// so this needs to be a dependency of our useEffect
}, [loaded])
return (
<div
className={`read_spectrum_container ${
loaded ? 'open' : 'closed'
}`}
>
<div className="player_container">
<p>{displayTime}</p>
</div>
</div>
)
}
export default ReadTime
Great!! Now, let's add the css as we have done previously.
.read_spectrum_container {
position: relative;
z-index: 0;
margin-left: -2.5em;
height: 52px;
width: 100%;
position: relative;
background-color: rgb(233, 233, 233);
border-radius: 0 20px 20px 0;
display: flex;
box-shadow: rgb(0 0 0 / 20%) 0px 2px 1px -1px,
rgb(0 0 0 / 14%) 0px 1px 1px 0px, rgb(0 0 0 / 12%) 0px 1px 3px 0px;
}
.open {
width: 100%;
transition: 0.3s all ease-out;
}
.closed {
width: 0%;
overflow: hidden;
transition: 0.3s all ease-in;
}
Toss it into the pot 🍯
Now we can toss it into the mix within our reader.component.js file. If you have been paying attention to the css styles that we have been dropping, you'll notice some weird positioning and flexing. This latest one will basically have the readers main styling and the ReadTime component sitting next to each other. Then we'll use margin-left: -2.5em to shift it slightly behind the play button (somewhere in the center of it). This makes the curves blend well together so that the element seems to be coming out behind as an extension of the reader component. So let's add in the finishing touches to get this component finished and ready to ship.
In reader.component.js replace the JSX with the following code to bring in the ReadTime component.
return (
<div className="loader">
<div className="wrapper">
<div
className="player_main_control"
onClick={() => handleClick()}
onKeyPress={() => handleClick()}
aria-hidden="true"
>
<div className="control_play_pause">
<div className={`control_icon_${playStatus}`}>
{playStatus === '_play' ? (
<FontAwesomeIcon icon={faPlay} />
) : (
<ReadSpectrum />
)}
</div>
</div>
</div>
<ReadTime loaded={playStatus === PLAY_STATUS.STOP} />
</div>
</div>
);
You should now see the full effect of all of our work come together. We have a Speech Synthesis text reader and some cool animation. In case you're stuck or would like to a look at the solution code, I'm including it below.
Conclusion
While the Web Speech API is still experimental technology, it's always fun finding out how far we can push the web technologies to solve new challenges that we face. While I tried to make this article seem easy to follow, there were a lot of challenges getting it to work while resolving a few of the common issues and limitations.
A big part of exploring technologies is diving into the rabbit hole and documenting what it is and what it is not. The Speech Synthesis is not necessarily meant to read entire blog articles worth of text. It is meant to read short string text. This small difference means that there is a big limitation on what it can do and what it will provide you.
For instance, you don't get access to a forward or rewind option. This means you can't control the starting point with a slider or a button without adding intrusive logic for handling those situations. You will also not be granted a "how long will this take to read" property so that you can create a cool slider and know where it will stop. These limitations might mean that you opt for a different, more costly solution or find a different way to roll your own altogether. There are also some additional optimizations you can do such as clean up on routing to make sure that the speech synthesis is cleared appropriately when redirecting or loading a new page.
If you have enjoyed this article, please feel free to share or reach out to me and let me know your thoughts.